
6-Slot Grid Formation, Faction Auras & Positional Counter-Swapping
Master the 6-Slot Grid targeting mechanics, the 3-Faction Counter Triangle (+20% DMG), Faction Aura scaling (4/5/6), and advanced Positional Counter-Swapping against backline assassins.
6-Slot Combat Grid: Arranged in 3 Rows (2×3 Grid).
- Safest Fortress: The Midline (
Slot 3&Slot 4) is the safest zone for your Hyper-Carry DPS, NOT the Backline!
Same-Column Protection: Always place your #1 Hyper-Carry DPS directly behind your tankiest Main Tank in the same column.
- Faction Aura: Activate at least
4/5/6same-faction heroes for+15% / +25% / +35% ATK & HP.
Backline Taboo: Never place squishy DPS heroes in the Backline (Slot 5 & Slot 6) against assassin teams.
- Dive Mechanics:
Wukong,Storm Maiden, andWindwalkeralways target the Backline first.


Anatomy of the 6-Slot Grid Formation Mechanics
Interactive 2×3 Six-Slot Formation Board & Arena Counter-Swap Simulator
Switch across all 6 Faction Meta Lineups or click any Slot (1 ➔ 6) to inspect column Aggro, the Midline Safe Zone & 4 PvP Positional Swaps
 4. Pure Horde 5-Mythic + 1 Awakened Endgame Lineup (#1 Optimal F2P/Low-Spender Meta)
Day 41+ through Season 1–4 (Full 5-Mythic Pure Horde Complete)🎯 Slot Targeting Physics & Positioning Rationale: Slot 3 (Wukong)
 Wukong
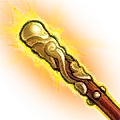 Ruyi Jingu Bang
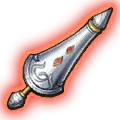 Duelist's Set ➔ Fury of Blood
In Top Heroes, every deployed squad consists of 6 positions arranged in a 3 Rows × 2 Columns matrix (2×3 Grid: Left and Right Columns).
- Targeting AI Priority: Strictly enforces damage priority along each vertical column and backline assassin dive paths as illustrated below:
6-Slot 2×3 Grid Formation & Targeting AI Flow
Splitting the Main Protection Axis (Left Column) and Bruiser & Control Axis (Right Column) against direct frontline attacks & backline assassin jumps

Enemy Frontline Direct Attack (Aggro) & Backline Assassin Jump Path
Enemy frontline locks direct Aggro onto Slots 1 & 2 by column; Assassins (Wukong, Storm Maiden, Windwalker) bypass the Midline to jump straight into Slots 5 & 6

Recommended: Adjudicator, Rose Princess, Beastmaster, Monk. Absorbs 100% of left-wing direct attacks to shield Slot 3.

Recommended: Pyromancer, Paragon, Storm Maiden, Wukong, Tidecaller. Immune to melee while Slot 1 holds Aggro and bypassed by initial assassin dives.

Recommended: Nun, Witch, Forest Maiden. Requires high-tier Armor & Helmet (HP/DEF) to survive AoE splash and backline assassin dives.
Left Axis Outcome: Hyper-Carry in Slot 3 enjoys maximum protection behind Slot 1 Main Tank to unleash full skill rotations.

Recommended: Desert Prince, Ne Zha, Sage, Secret Keeper. Holds the right wing, deals frontline pressure, and applies hard CC (Stun, Freeze, Knockup).


Recommended: Pixie, Bishop, Wilderness Hunter, Astrologer. Provides secondary burst or spawns minions from the safety of the Midline.

Recommended: Bard, Warlock, Soulmancer, Artificer, Petalis. Buffs team attack speed/energy and serves as the primary swap slot against assassins.
Right Axis Outcome: Sustains crowd control pressure, shares frontline load with Slot 1, and prevents enemies from breaching the Midline.
Ironclad Rule: If Slot 1 falls, all left-wing enemies immediately shift Aggro and march straight into Slot 3.
Frontline (Slots 1 & 2): Steel Bulwark & Aggro Control
Damage Intake &
AggroMechanics:100%of enemy frontline melee attacks lock ontoSlot 1andSlot 2by opposite column; ifSlot 1falls, left-wing enemies march straight intoSlot 3.Standard
Slot 1(Front-Left) Placement: Place your tankiest Main Tank with shields, damage immunity, tauntAggro, or invincibility (Adjudicator,Rose Princess,Beastmaster,Monk).Standard
Slot 2(Front-Right) Placement: Place a high-HP Off-Tank / Bruiser with frontline damage and hardCC(Stun, Freeze, Knockup) likeDesert Prince,Ne Zha,Sage, orSecret Keeper.








Midline (Slots 3 & 4): The Hyper-Carry DPS Fortress
Why is the Midline safer than the Backline? The Midline takes zero melee hits while the Frontline holds
Aggro, whereas assassins (Windwalker,Wukong,Headhunter) jump intoSlots 5 & 6first!Same-Column Protection Rule: Always place your #1 Hyper-Carry DPS (
Pyromancer,Paragon,Storm Maiden,Wukong,Tidecaller) right behind your Main Tank (Slot 1Tank shieldsSlot 3Carry).




Backline (Slots 5 & 6): Sustain & Tactical Control Station
Backline Tactical Role: Dedicated to Healers and Support Buffers / Controllers managing team tempo such as
Nun,Bard,Witch,Soulmancer,Warlock,Forest Maiden, andPetalis.Gear Priority Against
AoE&Burst Damage: Because the Backline takesAoEsplash and assassinBurst Damagedives, heroes inSlots 5 & 6need Armor & Helmet (HP/DEF) upgraded on par with Midline.







The 3-Faction Counter Triangle & Faction Aura Synergy
The two most decisive combat multipliers (Multipliers) determining victory between two lineups of equal Combat Power are the Faction Counter (+20% DMG) and the Faction Aura.
3-Faction Counter Loop: League Nature Horde League (+20% DMG)
When countering the opposing faction, your squad gains +20% DMG Dealt and -20% DMG Taken, stacking multiplicatively with the 4/5/6 Faction Aura badge (+15% / +25% / +35% ATK & HP).

Counters League (+20% DMG Dealt / -20% DMG Taken)
Counters Nature (+20% DMG Dealt / -20% DMG Taken)
Counters Horde (+20% DMG Dealt / -20% DMG Taken)
Counter Triangle Mechanics (+20% DMG Dealt / -20% DMG Taken)
- League counters Nature: High
Burst Damagecombined with wideAoEfromPyromancer,Paragon, andBishopwipes out all Nature summoned minions instantly before their sustain effects can ramp up. - Nature counters Horde: The forest of summoned units from
TidecallerandPixiepaired withMonkdodge shields absorbsAggroand disperses single-target slams fromWukongandDesert Prince. - Horde counters League: Frenzied attack speed, armor shred, hard
CC, and lifesteal fromDesert Prince,Wukong, andStorm Maidenpierce League shields and execute the backline beforeNuncan heal.


Faction Aura Scaling Benchmarks
Deploying 4 or more same-faction heroes in a 6-slot squad grants a massive stat multiplier (Faction Aura) to all heroes and soldiers in the queue:
Faction Aura Scaling Table (4 / 5 / 6 Same-Faction Heroes)
| Formation Setup | Same-Faction Count | Bonus ATK | Bonus HP | Special Effect & Strategic Role |
|---|---|---|---|---|
| Mixed / Rainbow Lineup | < 4 heroes | 0% | 0% | No Faction Aura (Strictly avoid from Week 2+) |
| 4-Hero Faction Aura Milestone | 4 same-faction | +15% ATK | +15% HP | Base Faction Aura milestone when fielding 4 same-faction heroes in Week 1 |
| 5+1 Flex Meta | 5 same-faction | +25% ATK | +25% HP | Used when flexing 1 off-faction Mythic counter hero |
| Pure Faction Lineup | 6 pure-faction | +35% ATK | +35% HP | Activates +20% Counter DMG & full Formation Bond |
Tactical Comparison: When to Run Intentional 5+1 Flex Formations
Trading Faction Aura for Star-Level Suppression & Exclusive Weapons (UW)
Pure Faction Goal (6 same-faction = +35% ATK/HP): While pure lineups are the endgame goal, dropping to 5+1 (+25% ATK/HP) or 4+2 (+15% ATK/HP) delivers overwhelming wins during transitions.
- Activation Condition: Effective when the flexed off-faction hero holds a massive Star Level lead (
1★ White=560 Shards) or Exclusive Weapon (UW Lv.10+).

Three Intentional Flex Formations (5+1 Flex Meta)
| Flex Formation Setup | Flexed Off-Faction Hero | Aura Trade-Off | Net Combat Value Gained |
|---|---|---|---|
| 5+1 with Tidecaller (5 League / 5 Horde + Tidecaller) | Tidecaller (1★ White + Divine Trident UW) replacing weakest 6th Tank/Support | Drops from +35% +25% ATK/HP (-10%) | Continuously summoned Water Elementals absorb enemy single-target Aggro + heal the entire team, far outweighing 10% raw stats on an unawakened secondary SSR. |
| 5+1 with Witch (5 League / 5 Nature + Witch) | Witch (3★ Gold – 1★ White) replacing low-star Nun / Druid | Drops from +35% +25% ATK/HP (-10%) | Provides the only Mythic Healer in S0–S1 with hard CC + AoE defense-shred curse without spending 9 Soul Stones (Red Soul Stones) to awaken an SSR Healer. |
| 5+1 with Wukong (5 League / 5 Nature + Wukong S2) | Wukong (1★ White + Exclusive Weapon) replacing secondary DPS in Season 2 | Drops from +35% +25% ATK/HP (-10%) | Adds massive AoE physical burst and clone pressure to shatter enemy frontline shields in high-stakes matchups. |
Advanced Strategy & Quantitative Data (PRO)
Early-access preview unlocked free for all commanders





Content Under Construction & We Value Your Feedback!
This content is currently under active development and may not be 100% accurate yet — please use it as a reference and share your thoughts with us. If you spot any issues with the content, please leave a comment below for our development team. Thank you!
Commander Discussion & Field Notes0
Discuss tactics and ask lineup questions by Server age. Your Game UID is strictly hidden and never exposed.
Please select or enter your Game UID to comment under your Character Nickname + Server (Your UID is never shown).